Good news! I've been accepted into
Google Summer of Code 2015 to work with
Saros throughout this summer. So I'll be blogging about Saros whenever I get some free time :) This post is a basic introduction to what Saros is.
What is Saros?
Saros is basically an open source eclipse plugin for distributed collaborative software development. If that sounds too Greek, imagine a Google Doc shared with several people editing it at the same time? With Saros you can share an Eclipse project with your friends or teammates and code collaboratively the same way! Sounds awesome right? So why not try it out?
All you need is.
- A running Eclipse instance. (download from here)
- An XMPP account. (Search for free XMPP account providers and you can find many. Or else you can create a XMPP account through Saros itself after installing)
So lets start setting up Saros.
01. Open Eclipse and Go to Install New Software.
02. In the "Available Software" wizard click "Add" and Enter a name for the repository and for Location enter "http://dpp.sourceforge.net/update" and press OK.
03. Select DPP from the available software list and click Next.
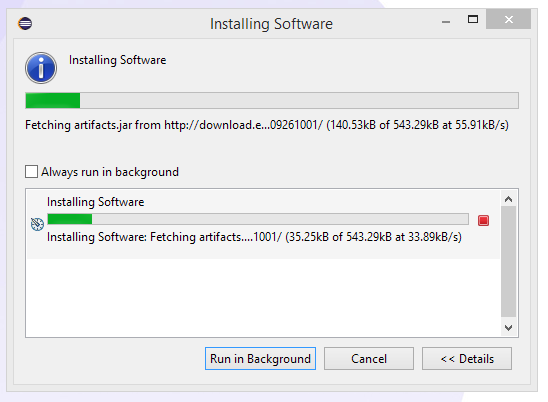
04. Review software details and accept the licence agreement on next two pages and click Finish. Saros will begin to install as shown below.
05. You will get a warning saying you're trying to install unsigned content. Press OK to accept that and proceed.
06. Eclipse will ask to restart for changes to take effect. Accept the message and let Eclipse restart. After the restart you will notice Saros view being displayed on bottom of the Eclipse window.
If Saros view is not displayed go to Window > Show View > Other and select Saros from the list of views as shown below.
07. To try Saros we have to log in using a XMPP account first. Click on the drop down arrow next to connect button on Saros view and click Add Account and provide your XMPP account details.
If you are using Windows the firewall might ask for permission to let Eclipse access the network. If asked allow Eclipse to access your network.
You will be logged into Saros and your contacts will be shown in the Saros view.
You need at least one other contact online with Saros up and running to share a project and start working. So ask one of your friends to follow the same steps and setup Saros or get another instance of Eclipse running and setup Saros by yourself.
Now we're ready to share a project!
08. There are three ways you can share a project as shown on the right side of the Saros view.
- Right clicking on the project > Click on "Share With" > Select contact.
- Right clicking on a contact > Click "Work Together On" > Select project.
- Use the Saros menu in Eclipse menu bar.
For demonstrating I will go with the 2nd way as shown below.
When the project is shared the other user will get an invitation to join the project like shown below.
Joining user has to accept the invitation and select a location for project to be saved. Now you will be able to work on the shared project collaboratively in real-time.
Shown below is an example of two people working on the same file of the same project.
Saros is not all about sharing a project and coding in it together. There is so much more Saros can do. This is just a quick start guide for a beginner to try Saros and see how it works.
Does Saros work only with Eclipse?
No, developers of Saros are working on a plugin called Saros/I for IntelliJ IDEA. But it is still under development and buggy. Follow
this guide if you want to try Saros/I.
If you want to know more about Saros visit their website at
http://www.saros-project.org/ . They have a detailed guide on Saros. If you are willing to contribute to Saros go clone the source code and start hacking :)